Developer Blog

Game mod ideas

| view on WordPress

Now that my shooter is more or less finished to the level I first planned, I have thought about some extra features that could be added to improve it further. Here are some of my ideas and how to implement them:

Survivor camps

a camp with two survivors and some guns

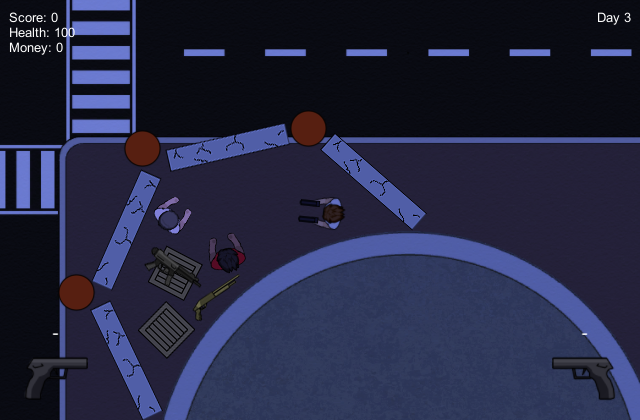
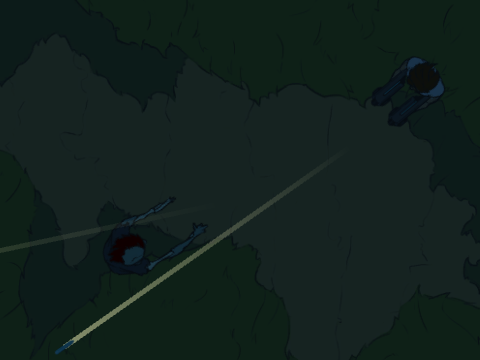
This is an idea I've had since I came up with the urban theme of the game, but I wouldn't have had time to add it. The idea is that as you are walking around the city, you might occasionally find a group of other survivors. They would have guns that you could pick up, and they would be able to fight with you for a while. This would provide a lot more incentive to explore the map, because currently there is nothing to gain from moving around.

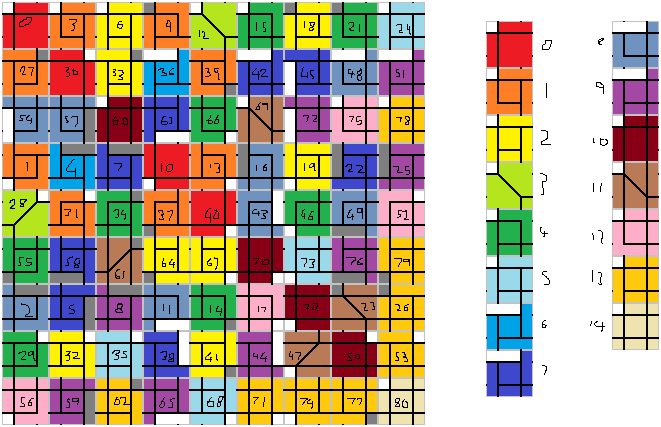
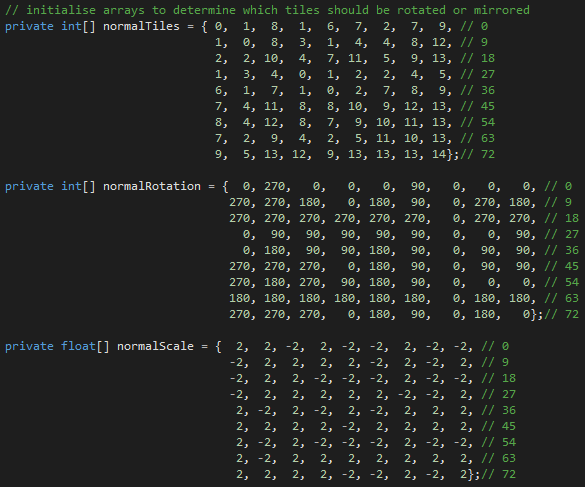
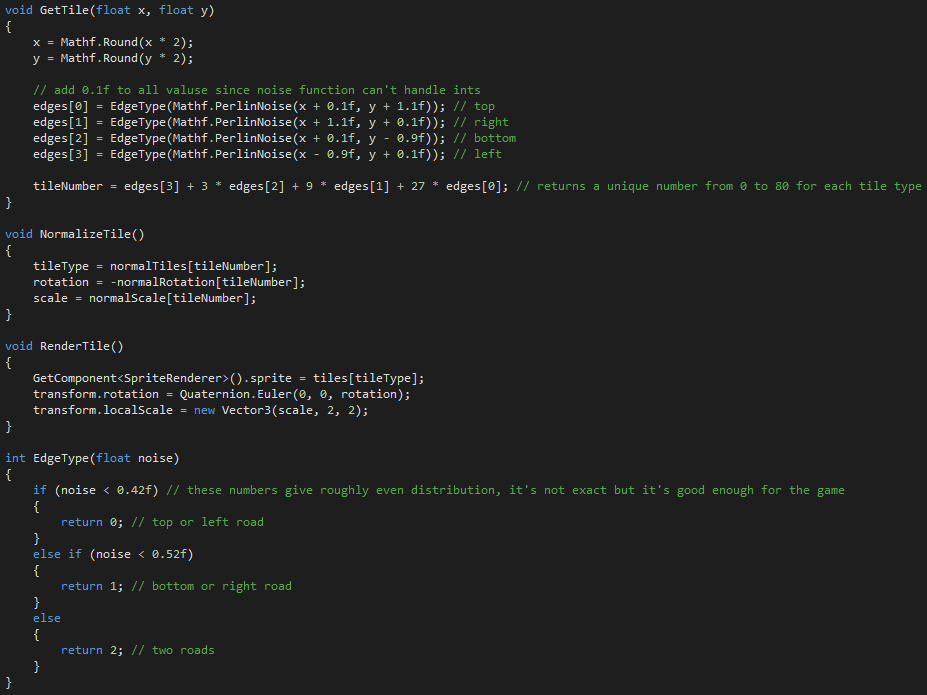
I could make the camps spawn quite easily with a slight change to the world generation script, by adding a rare chance that certain tiles will turn into camps. The hard part would be making the AI for the zombie hunters when they follow you - they would have to pick a zombie to attack, and at the same time avoid being hit by other zombies.

The camps would be quite well fortified, but I wouldn't want the player to stick around them forever once they found one. I could make the fortifications take damage as the zombies attacked them, which would add another layer of complexity to this mod idea. I could also give the zombie hunters limited ammo, so they wouldn't live forever no matter how good they were at fighting.


Co-op mode

split-screen co-op mode

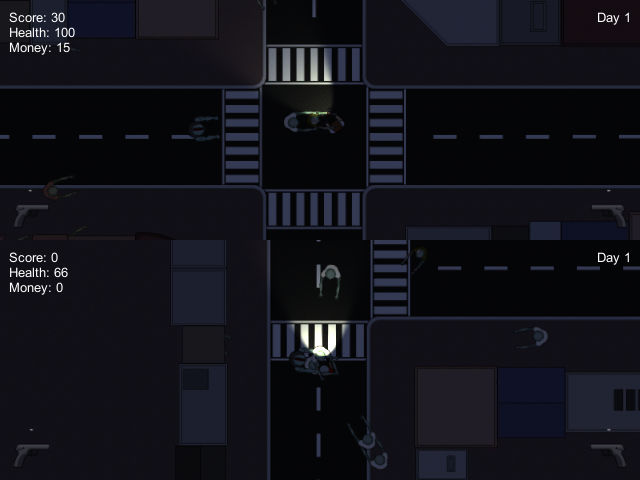
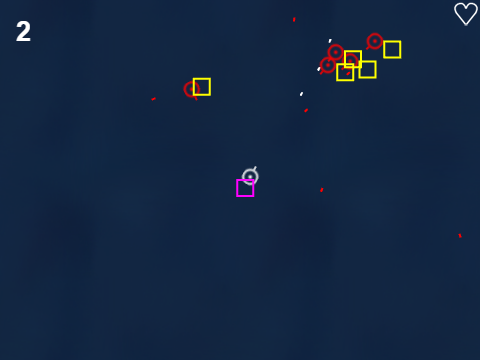
This is a fairly standard feature, each player would control one character and the screen would be split to show both views. The first problem with this is that both players would have to aim, but the current game uses the mouse, which can only be used by one player. A possible solution would be to have controller support, which I was originally going to have in my game but which I abandoned early on because I though most players would prefer to shoot with the mouse than the less accurate control stick.

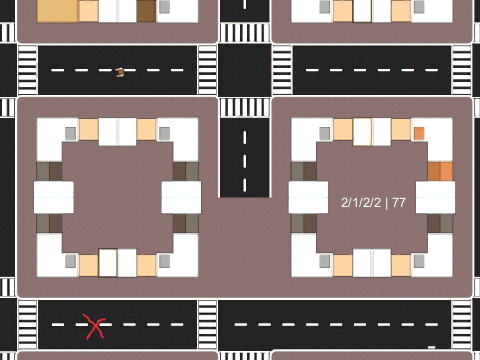
Split-screen would be taken care of by having two cameras, which is fairly easy in Unity. However, I would also have to change many scripts which rely on the position of the player or the camera. For example, the world generation only shows tiles around the player; I would have to change this to generate tiles around both players if necessary. The zombies' AI would have to be changed to pick a target, and they would have to spawn around both players.

Making an infinite world

| view on WordPress

A month ago I made a post about my plans for the world generation in my game. I had planned to make the world generate procedurally from a set of tiles, but I tried it then and it didn't work at all as planned, so I moved on to other things and left the world as the same tile repeated forever.

This week, I had another go at making it work. I started with a sketch I made when I first planned the idea, which laid out all possible combinations of tiles. I worked out which tiles could be rotated and flipped to create others, that way I would only need 15 tiles rather than 81.

sketch of all map tiles in the game

The game was meant to generate tiles using the Perlin Noise function so that the roads on their edges would always line up. The way I did this was by generating a value for each edge of each tile based on its position. Since the right edge of one tile is in the same place as the left edge of the next tile, they would both have the same value, so they would line up.

Once it had generated the edges, it would convert the four edge values into a unique value representing the tile, and from that value it would work out which sprite to use, how much to rotate it, and whether to flip it. I tried to work out a way to do this systematically, but I couldn't and I ended up hardcoding it into a bunch of arrays:

This is the script I used to generate the tiles - GetTile, NormalizeTile and RenderTile are called in order:

The script didn't work when I first ran it, so I wrote some debug code to show details about each tile. This showed that it was actually generating the edges correctly, but it was displaying the wrong tiles.

There were two causes of the problem. The first one was easy to fix - in the line of GetTile that adds up the edges, I had them in the wrong order. The second problem didn't make much sense to me - I had an array of booleans to decide whether to flip each tile, but when I tried to read them they always came up as false, so none of the tiles were flipped when they should be. I changed it to the current array of 2s and -2s and tweaked the rendering code slightly, and it worked, which means the world generation now works as it should.

Zombie types

| view on WordPress

In today's updates to the game I finished off the different types of zombies the player will encounter.

As usual, I started off by creating original artwork for each zombie type to replace the default ones I had been using until now. Most of the zombies are based on the same design, but I changed the colours and some of the details to make them more distinctive. In-game they are also different sizes.

regular, fast, brawler and spitter zombies

The first is just your regular weak zombie. It's slow, and can't do much besides walking into you, so it's only a danger in large numbers. This one is pretty much the same as the default zombie from the template.

The second one might look a bit worse for wear, but it's faster and smaller, so it's harder to hit. It can quite easily catch up to the player, and can also take a couple more hits before it dies.

The big heavy one is a brawler, and it's where the zombies start to get interesting. It's big, slow and can take a lot of hits, but it also has a special attack. When it hits the player, it stuns them for a couple of seconds, leaving them vulnerable to attack from other zombies.

To create this zombie's behaviour I modified the basic damaging script to send a message to the player when it came into contact. I also added knockback to the attack, so I had to make the player's movement script check if the player was stunned. The result gave a decent smooth knockback effect:

script to stun the player

The brawler also has the most unique graphics of the zombies, but I'm not completely happy with it, so I might redo it later if I have the time.

The final zombie type is probably the most deadly. Like the brawler it's big and slow, but it packs a powerful attack: it can spit a ball of unidentified green stuff at the player. It does quite a lot of damage and it's hard to avoid because it moves so fast; the best strategy is just to kill it before it gets a chance to spit. From the technical side of things the spit is just a bullet with a different appearance, and the zombie's spitting script is a slightly modified version of the player's shooting script.

Each of the zombies gives a different score when it dies, with the tougher ones giving more points. The money gained from each kill also scales with the score, but I've halved the amount that the player gets. This was because it was too easy to hold on to a picked-up gun forever by refilling it with hundreds of rounds from the shop each day. Now the player should get money at about the same rate they spend it, which is much more balanced.

Lock and load!

| view on WordPress

Today I made a lot of changes to the guns in the game.

To start off, I made some sprites for each of the three guns in the game: the pistol, SMG and shotgun. I made them by tracing over actual images of guns in Photoshop to recreate them in my game's art style. These sprites are for the interface and on the ground; when the player hold them they will have a different top-down sprite.

pistol, SMG and shotgun sprites

The next stage was making a new game object for gun pickups. I originally tried to make it as a prefab, but it worked out easier as a game object which could be enabled and disabled as needed. The gun has a small chance of dropping every time a zombie is killed, and the player can pick it up by holding shift and clicking either of the fire buttons.

picking up a shotgun

Making the gun drop was not as easy as it would seem. Because the zombies are prefabs, they can't reference the gun game object in the inspector, so they had to find it in the script when they spawned. The problem with this was that the gun was not always enables, and it is not possible to find a disabled game object with the GameObject.Find() method or any other similar ones. Eventually I found a workaround by making an always-enabled parent of the gun, and selecting the gun via that parent. It's longer than I'd like it to be, but it works.

script to select the gun

The picked-up guns have limited ammo and switch back to the standard weak pistol when they run out. I wanted to show the player how many shots they have left, so I created a UI overlay to show which guns the player is wielding and the ammo left. I did this with the canvas, because when I tried the GUI methods the text never appeared in the right place.

ammo display showing pistol and shotgun

Finally, I added an option to buy ammo from the shop. This was fairly straightforward because I could just reuse the scripts for buying health with some minor changes.

Creating the menu system

| view on WordPress

Today I set up most of the game's menu system. As the game currently is, the player can change the game options when they start, then play the game, and finally see a game over screen when they die.

I had already done some of the menu system - the shop screen and half of the options menu - using Unity's GUI scripts. These need you to code the positions of each UI element manually and don't adjust to different screen sizes very well. The other day I found out about an easier way to do it: with a canvas object.

The canvas is drawn in the editor just like a sprite, so it's easy to see how it will look in-game without having to tweak a script so many times. It's also easy to hook up the buttons to run any public method in any sprite, so I could get rid of some events from the script.

making the options menu in the editor

After I created the new UI, I tested it and ran into a problem. The shop wasn't showing when it should, and I was getting an error in the console:

UnassignedReferenceException error message

It turned out that there were still some remnants of the old shop system, and they didn't like the changes I'd made to the UI script. I deleted them since they weren't needed any more, and ran the project again. This time, the shop came up twice each day.

I did some more debugging, and I found that the sunrise method, which triggers the shop, was being invoked twice each day. I never found out why, although it seemed to be something to do with the nights getting longer as the game went on. I could fix it by making all nights the same length, but I didn't want to get rid of that mechanic so I added a simple line to cancel and other invokes.

script to cancel invoking the sunrise

The shop works now, but there is one other problem with the menus still to be solved. I've known about it for some time, but I had just ignored it until now. The problem is that I can't find a way to restart the game. I've tried a few ways, but all of them freeze the game when it reloads. Unfortunately, this means that you have to stop and start the project when you die.

Make your own zombie hunter!

| view on WordPress

While I was filling out my game design document, I realised that I hadn't really though of a character at all. So far I've just been using the hero sprite from the template, and I had just imagined the game would have a generic featureless protagonist.

Since I want to replace all the template artwork with my own, I would have to design a character sooner or later - or I could let the player do it themself. I always like it when games include character creation, so I decided to add it to my own game as well.

To make the player customisable, I divided him up into separate sprites, each one being a customisable area. All these sprites are attached to the main hero sprite in the hierarchy, so there was no work to do to make them show in the right place. To make the sprites I traced over the body, arms and head of the default player to get the shape right, and made spritesheets for each part in different colours and, for the head, different hairs and hats as well.

The hairstyles and hats available to the player

To make the parts display I made each sprite sheet into an animation. Getting them to show the right part just needed a simple script to set the animation to the right frame and set its speed to zero.

Script to change the appearance of the player's body

Right now the player is still locked to one appearance though - I can only change it by changing the script to select a different frame. For the next update, I'll create the menu system, which will let the player change their character as well as seeing the controls and game options.

Day and night, and future plans for the shooter

| view on WordPress

I added a daylight cycle to my zombie shooter a while ago, but it never really did anything besides changing the lighting occasionally. Now I've changed it to make zombies spawn during the night, which adds a sort of level or wave system to the game.

Each night, the player has to fight off zombies until the morning, and collects money for every kill they get. During the daytime, the player can spend the money in the shop, which currently offers health but will also be expanded to sell different weapons.

Shop screen with option to buy health

Creating the shop was harder than I expected, because I had to use delegates so much to send messages between game objects. Previously I had only used them in the tutorials and not fully understood how they worked. I also had to get to grips with the GUI functions in Unity to create the buttons and make the shop appear at the right time.

The shop also had an issue of opening as soon as the night ended, while zombies were still able to attack the player. I solved this problem by making the zombies burn and die when the sun rises, which also works to discourage the player from running away from zombies, since they wouldn't get any score or money when the zombie burns.


I have also been thinking about what changes I should make to the game to make it less like the tutorial I've been following, and I decided one of them will be using an urban environment. Apart from the obvious visual differences, it will also create a much more enclosed playing area, so the player is in more danger of being cornered by zombies.

The environment will be infinite and procedurally generated. I've already written scripts for infinite movement re-using the same tiles, and I have planned how the world generation can work.

Unity has a premade Perlin Noise function which gives a 2D array of pseudorandom data points. The game will take a data point for each of the four edges of a map tile, and from these it will decide the configuration of the roads leading off that edge (two roads, one road at the top, etc.) and from the four edges it will decide which tile to use. That way, the tiles will join seamlessly since their edges will match, but the environment won't have to be an endless square grid. To encourage the player to explore, the game will have better powerups the further they go from the centre.

There is one possible problem with this, which is the large number of tiles I would need to make, and which the game would have to load. To solve this, I will rotate and reflect tiles to reduce the number I need.

Disappearing bullets

| view on WordPress

I recently set up my game to use a pool manager, which is a way to recycle game objects rather than creating and deleting them all the time, for better performance. I added the zombies to the pool, and they worked fine, being able to spawn and be killed as I intended.

When I added bullets a problem came up. Even though I made sure all the scripts were changed to deactivate the bullet instead of destroying it, sometimes the bullets still got destroyed when they were fired. I couldn’t understand why, so I added some debugging code to throw an error when a bullet was destroyed:

Console output showing bullets are destroyed

It showed that something was calling the destroy method, even though I check every script and none of them had it, even the ones that were unrelated to bullets. At this point I tried stripping out parts of the code piece-by-piece, but nothing worked that didn’t also break the bullets’ behaviour.

I finally found the solution while looking through the components attached to the bullet. I had added a trail renderer to them for a tracer effect, and I found the trail renderer had an autodestruct property. It’s on by default, and it causes the object it’s attached to to destroy itself if it’s been idle for a certain amount of time. I can’t really see the logic of giving this task to the trail renderer, or at least why it is enabled by default, but any way it was easy to fix by simply turning it off.

Bullet trails everywhere

The trail renderer did cause one other small problem. Since I changed the bullets to use the pool manager, their trails had been going off at odd angles. This was because the game was drawing trails from the location of the last time that bullet was pooled. Fortunately this had another easy fix, since the trails can be cleared with a Clear() method call when the bullets spawn.

Making a game in Unity

| view on WordPress

I've recently started working on a game in Unity. It's a topdown 2D zombie shooter where the player must survive as long as possible.

This is my first time using Unity and so far I'm mostly following a tutorial. Currently the game has basic movement and shooting mechanics, and a zombie capable of following the player and being killed; the next stage will be to give the zombie better AI than its current script which simply moves straight towards the player, to make it attack the player when it gets close, and of course make it spawn in waves.

The game so far

So far I have made a couple of changes to the template. First, I made a daylight cycle with a simple script to change the colour and intensity of a light, with a bit of experimenting to get a smooth transition from night to day. I also included controller support, which was harder than I expected since analog stick movement is quite different to mouse movement, I had to change both the input settings and the script to stop it from centering when it shouldn't.

Another change I made which will have an effect on gameplay later on was to let the player fire two guns independently; the template only used one firing control. I set it up so that the guns can have separate bullet types and fire rates, and I plan to let the player pick up guns during the game, and by dual wielding they can use many combinations of weapons for more gameplay variation.

One issue I can see arising from dual wielding is that there will be a lot more possible appearances for the player. I plan to solve this by using separate sprites for each sprite and binding them to the player using the object hierarchy.

Another Phaser demo

| view on WordPress

Today I added another Phaser demo to my portfolio. It's a top-down shooter, which I used to help get the hang of game states, Arcade Physics and the camera.

Top-down Shooter

I started out by making the player move around, and attached a camera. Rather than having the background fixed in the game world, I used a tilesprite fixed to the camera - this let me use one sprite to look like a tiled ground texture across the whole game world. The ground texture isn't too noticeable but it does give a sense that the player is moving when you can't see anything else on the screen. I also added enemies, which went smoothly enough.

The first problem came when I added bullets. When shooting an enemy, sometimes the bullet would go right through them; other times the enemy would die when the bullet missed it.

After a bit of experimenting I found out that this happened most when the enemies were facing left. I couldn't work out why, and after trying and failing to get Phaser's debug tools to work (the hitboxes just wouldn't show up), I wrote my own code to highlight the hitboxes. This showed where the problem was:

Debugging the top-down shooter

The hitbox was always attached to the top left corner of the sprite. This worked fine when the sprite was facing right (its original rotation), but when it turned around that became the bottom right corner, so the hitbox was sticking out of the sprite. I tried a few things to fix this - repositioning the hitbox each frame, which turned out to be too complicated for me, and using Ninja Physics, which introduced more problems than it solved and would have made me rewrite most of the game if I stuck with it. The solution turned out to be disappointingly simple - I used pivot to make the sprites turn around their centres, and I fixed it by using anchor instead.

Then I playtested it, and it turned out it was far too easy, because you could just fire a constant stream of bullets. I could have just changed the fire rate, but instead I used this to add a new game mechanic. Firing the gun in long bursts makes it heat up, and if it overheats you have to wait for it to cool down completely before you can fire again. This made the game a bit more interesting than just having slow firing.

More changes to my site

| view on WordPress

This is just a recap of the changes I've made to my site over the last few days:

  • I put my Phaser demo from last week onto the launch page to give it more attention. In future I'll keep this space for my latest demo.
  • Speaking of demos, I moved the demos on the portfolio page to their own separate pages. This will solve issues where they were running slowly (particularly the Game of Life) and reduce the loading times.
  • The blog on my site is now a proper page, not just an embedded WordPress site. Unfortunately this means I have to manually copy each post across to my site, because WordPress won't let me load my blog into JavaScript. I did manage to include some JS to fill the navigation bar, but It's less that what I wanted. I'll see how this plays out, but if it causes problems I might have to look at other blog hosts.

Making my first Phaser demo

| view on WordPress

Last week I started using Phaser, an open-source game framework using HTML5 and JavaScript.

At first I worked through the tutorial, which covered installing the framework on my site and then making a basic platformer demo. I experimented with the physics and changed the controls to make the player slide when they stop moving, and an option to let the player push around the stars instead of collecting them.

Then I started making my own demo. You control a plane with the up arrow, like in the old Copter game. Instead of adding terrain, I decided to focus on interaction between sprites, so I added some coins that fly across the screen, and you can collect them to gain points. I also added an ability to shoot bullets, which destroy the coins on contact. And of course, I had to put some explosions in the game.

Making it, I came across a couple of problems - firstly, that the game started as soon as you loaded the page and never stopped. I fixed this by making it start in a paused state, although it still used a single update loop for everything, and had to check if it was paused each frame. Since then, I've learnt about game states which let you properly pause the game, which I'll probably use in future demos.

I also had the problem of scaling the game world. While I was testing it on half the screen, the world was wider than the page and had scrollbars, so it looked ugly and was hard to play. In the end I had it work out the scale at the start, and then I had to redefine all the positions relative to that scale.

Phaser Plane Demo

As always, the demo is available on my portfolio page.

JavaScript and jQuery

| view on WordPress

As an introduction to programming web games, I've been learning JavaScript for the last couple of weeks. This started with a look at what JavaScript can do, which I could see would be useful for both making games and adding functionality to my site.

I made the usual "hello world" scripts and testing for inputs, and also a "fizzbuzz" program to get familiar with the language. Unfortunately I found the way of addressing elements on the page, and adding events and nodes, quite complicated. This is where jQuery comes in - it greatly simplifies most of these operations, so I could easily add content to the page or create an event listener with a single line.

This came together with me making my first demo on my site - Conway's Game of Life, using JavaScript and some CSS for the display. The demo builds up a grid automatically and lets you draw a starting pattern or change the pattern while the game is running. It also supports speed control and frame-by-frame stepping.

Game of Life demonstration

The demo is playable on my portfolio page. Future updates may allow custom grid sizes and preset patterns.

A Reflection on Dev 101

| view on WordPress

Over the last four weeks, I've been doing the Dev 101 work as part of the introduction to Computing and Games Development. The unit has covered the basics of various tools we will be using over the course.

We started out by looking at the operating systems we would be using - both Windows 7, and Mac OS X which was new to me. The differences turned out to be quite easy to learn though, as they are mostly different names and commands for the same things. This session also covered text editing, file management and using 7-Zip, and saving and working with PDFs. All of these were fairly easy as I had used them before.

One part of that session which I found harder was recording videos. This was something I hadn't done before; the setup was straightforward to follow and I was soon able to record a brief commentary for a game, but it took a few more takes to get a decent quality video, which was mostly trial and error for the settings that would work on my computer. The editing was simple - just a few changes to the sound - but having to convert between many formats was a bit tedious.

In the next session we looked through the tools in GitHub student pack. Most of them won't be of use until later in the course, but it was useful to know what would be available when we needed it. The services we did use were Bitnami and DigitalOcean, to set up a virtual private server. This was harder and more confusing to me - I followed the instructions to set it up, but I didn't really understand what each step was doing, which might cause some problems when I next have to set up a server if I don't recap the process.

The final session of the module material, covering searching and market research, will be useful for finding specific information later in the course, particularly finding solutions to technical problems where the importance of specific, relevant search terms was stressed. The market research was somewhat mixed - the information was easily readable and understandable once found, but some of it wasn't so easy to find, especially on App Annie which hid it behind paywalls and required logins.

Overall, Dev 101 was not too challenging, and I understand that it will be useful for later development work, where I will be able to apply knowledge from it. In order to do this well, I should try the VPS setup again, and try to better understand the process. Other than this, I fell that I have learnt the material well.